
How to Clean and Prepare Concrete Floors for Color Stain
26th Jun 2025
When considering color stain for a project, substrate color and texture are significant factors within the design. This could be in color development, exposed sand or coarse aggregate, and texture. All of these will affect the final appearance.
Properly preparing the surface is one way to minimize surprises while staining a floor.
Surface preparation not only provides a clean surface but also increases the absorption rate, flattens the floor, roughens the surface, and can remove surface stains. Regardless of why the surface needs to be prepared, it’s best to take this step seriously.
Assessing the Surface Preparation Level
Every concrete slab has its own characteristics. It might have a very well-troweled surface with a tight, uniform appearance. Then some floors are not so perfect. Chips, cracks, concrete trowel marks, and ghosting produced by the earlier floor system are all defects that you might run up against. It’s not that the proper surface preparation will alleviate every issue, but it might minimize them.

Tile Ghosting
When most installers hear the term “surface preparation,” they think of only roughening the surface. This is true, but how about producing a uniform surface, increasing porosity, or removing surface contaminants? These are the other reasons. The level of surface preparation will be printed on the material’s technical data sheet, recommended by the stain manufacturer. They will describe the recommended level for their material.
So, how does a manufacturer describe the level of surface preparation? They can do it visually, physically, or in written word. Unfortunately, there is a level of interpretation with each method. Back in the late 1980s, the International Concrete Repair Institute (ICRI) was organized. Their priority was to develop a system where an engineer, manufacturer, and installer would have a clear understanding of what preparation level is needed for a successful project.
ICRI developed the Concrete Surface Profile (CSP) system. The system includes a written description of the surface prep level, physical samples of the surface texture, and a value associated with each level that correlates to aggressiveness.
For example:
If the architect was specifying a thin mil coating, they would go to the material’s technical data to find out the surface preparation the manufacturer specifies. The manufacturer calls for a CSP 2 - a clean, open profile. When the contractor reads the specification and sees the CSP 2, they know that a grinder will produce what is needed. This system is being used worldwide and minimizes confusion with surface preparation.
Accessing the Substrate
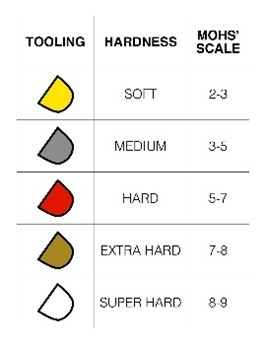
We all know that concrete is hard. The term “hard” has a wide range of meanings. The MOHS Hardness Test is the easiest method to evaluate the surface hardness. The MOHS Test consists of a set of 4 picks. Each pick end (8 of them) consists of a different material. Each material is associated with a different hardness. Start with the lowest numbered pick, hold it like a pencil, and scratch the concrete surface. As you move from one pick to the next, the scratch will diminish. As soon as the next pick does not produce a scratch, go back to the earlier pick. That will be the hardness of the concrete surface. Once the hardness is found, the grinder tooling can be selected.

Color variations will impact the final stained appearance. If there are stains, curing technique imperfections, or ghosting left behind after VCT is removed, then a normal surface preparation level might not be enough to provide a uniform appearance. This is when the stain type needs to be selected. Some stains will hide these imperfections, but others will not.
When evaluating the surface, the stain type also needs to be examined. Pigmented stains typically produce an opaque final appearance. These materials have the ability to hide or cover color variations. Dyes are sometimes considered a stain. Dyes are translucent and add color to the surface without it looking like it has been painted. They develop no surface film to hide color imperfections.
Cleaning the Concrete Floor
Most stain applications need a bit more surface preparation than just a good brooming. All coloring methods bond to or absorb into the concrete surface. The keyword is “surface”. In either case, the surface needs to be durable to hold onto the stain.
When concrete cures, it produces a multitude of hardnesses throughout the slab. The bottom of the slab, touching the ground, will be the most durable. It has been properly cured in an ideal, moist environment. It has been protected from all negative, external environmental conditions. While curing, carbon dioxide will attack the exposed surface, weakening it. Improper cuing can also produce a weak surface. If the moisture leaves too soon, the surface will show great differences in strength. Concrete finishing techniques will also affect surface durability. Finishing too early or too late will cause issues.
Using the proper surface preparation method will increase the potential of producing a well-stained floor. The surface needs to be mechanically prepared by removing any weak surface and exposing a porous substrate for the stain to be absorbed.
Surface Preparation Techniques
Surface preparation is the first step in any flooring project once on-site. This can involve something as easy as sweeping or using an auto-scrubber to wash the floor. Concrete repair and control joint filling can also be included in the preparation step.
Concrete repair can range from fine crack repair to large spall repair. Communication with the client is important when concrete repair is needed. The extent of the work could add more time to the installation process, which comes with added cost. The repair material will need to be compatible with the color stain that is being used. Obtaining full approval of the repair method from the client in writing is highly recommended. An on-site mockup will help in obtaining the approval needed.
Every interior and exterior concrete slab should have control joints cut. These joints are voids in the slab to direct the concrete shrinkage. When concrete cures, it shrinks. When it shrinks, cracks will form. By cutting control joints in the slab, you are creating a weakened plane, allowing for the shrinkage. There are different joint filling materials suited for interior and exterior environments.

The prep level required by most stain manufacturers will be no higher than CSP 2. Stains are not designed to build film to fill a rough floor. They penetrate the substrate, providing color. Some stains are semi-topical. Although they do leave a slight surface film, it is not to fill a rough profile.
The result of mechanical preparation is a uniformly abraded surface that produces a substrate with a consistent appearance when stained. The method that is most widely used is grinding. When grinding, the aggressiveness is dictated by the abrasive selected. Now, the weight of the machine will also impact the surface profile, so that will need to be taken into consideration.
One reason for performing surface preparation is to obtain the recommended surface profile. Another reason is to remove or reduce color variations throughout the slab. These variations could be surface stains from mud, paint, sheetrock mud, or dark trowel blemishes. Surface stains are always an issue when using a translucent color stain.
Surface-only imperfections can be ground off. Dark trowel marks are a good example - They might be visible on the surface but are not very deep. The issue with preparing a burnt or over-troweled slab is that the cap is extremely hard. It takes special attention to grind through it. A test sample needs to be installed to find which diamond tooling will cut efficiently.
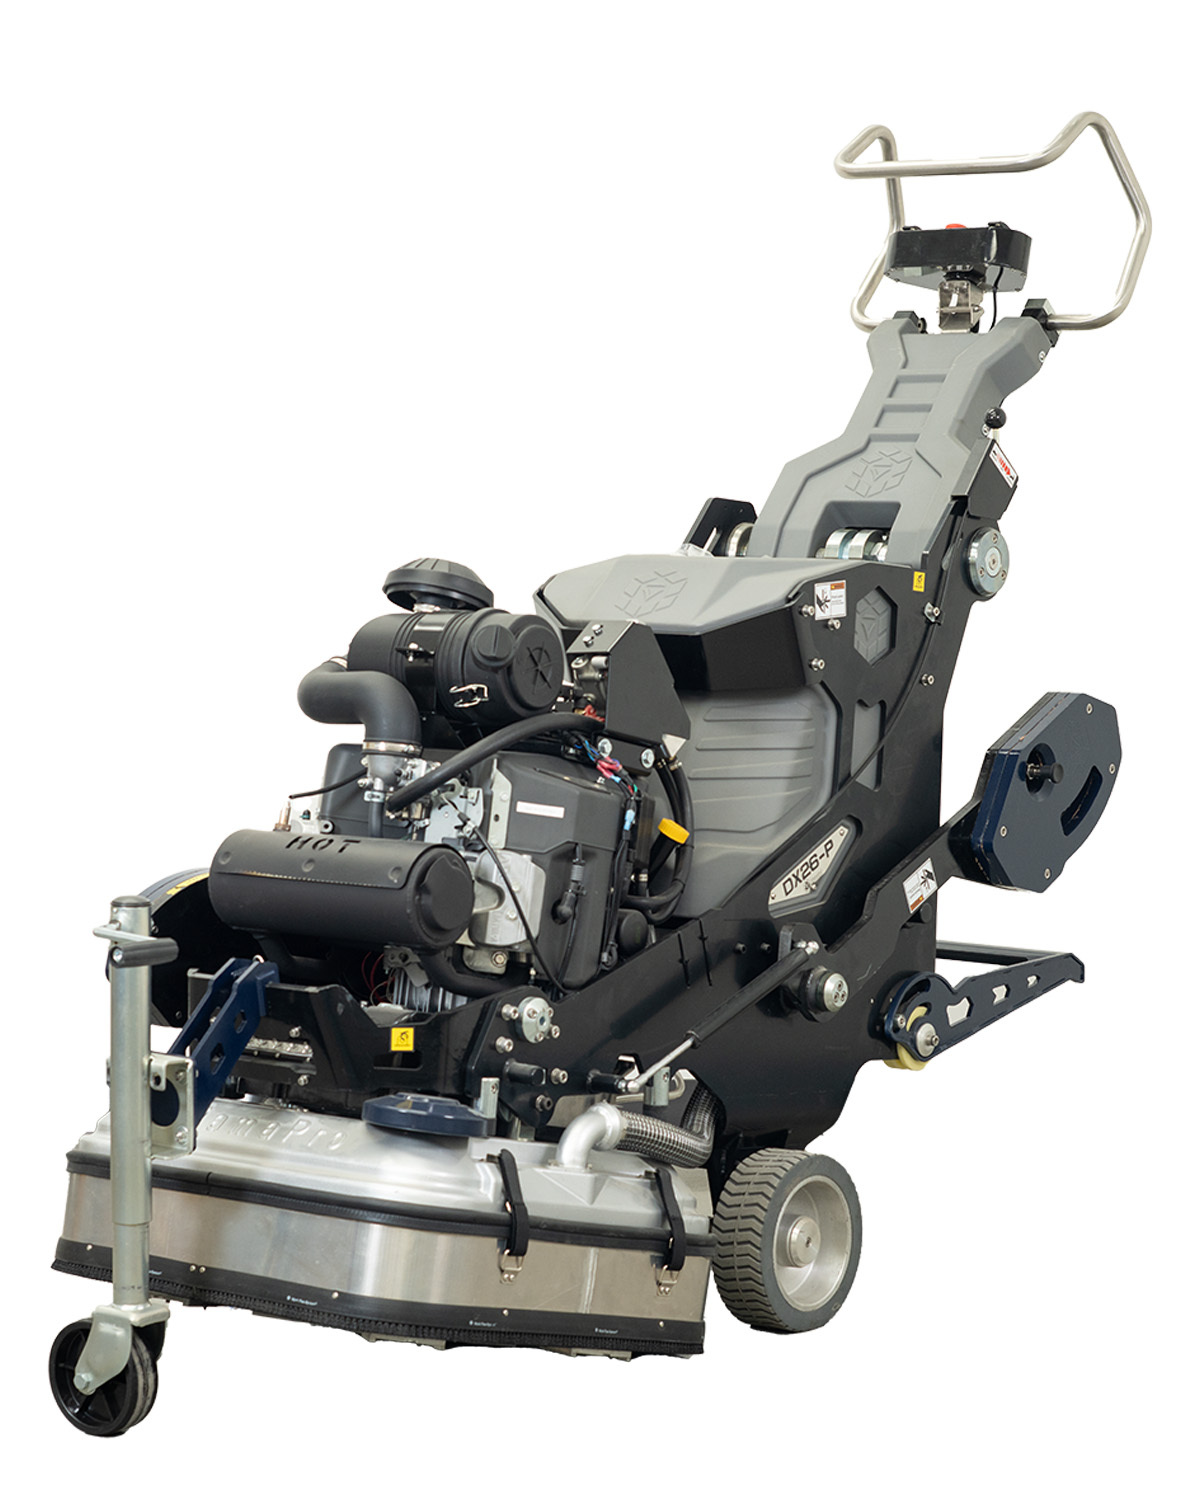
DiamaPro® DX26-P Concrete Grinder
Final Steps Before Staining
Review the technical data from the stain manufacturer. Make sure that everyone involved has read the installation instructions and safety precautions. The chemical make-up of stain materials can vary. There are chemically cured stains, waterborne, and chemically reactive types. Not all are the same.
Check for surface porosity. After the surface has been prepared, if the surface does not absorb the stain, a failure will soon rear its ugly head. Spray water on a small, prepared area. If it absorbs relatively fast, you are good to go.

Water Absorption on Concrete
After your last prep step, it’s good to auto-scrub the entire area. All dust needs to be removed from the surface pores. Check the auto-scrubber to ensure it is in good working order. The brush should be soft enough not to negatively affect the surface profile. The squeegee should be able to remove most water, leaving the surface squeaky clean. A cleaner, such as DiamaPro® Diama-Clean 30, can be induced into the freshwater tank to help produce an efficient cleaning action.
After cleaning, allow the surface to dry. In the stain literature, it should describe the amount of water that can be in the slab before application. Follow it. Moisture might affect the absorption rate, reduce the chemical reaction, or even change the final color.
Cracks, spalls, and other imperfections need to be addressed before applying the stain. The repair material should be selected based on the type of stain used. The color and texture might alter its final appearance. The stain manufacturer will be able to supply a list of repair materials suited for your project.
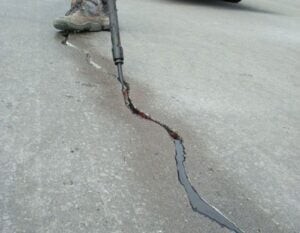
Crack Repair
Conclusion:
There is much more to preparing for concrete stain application than just sweeping the dirt from the floor. Technical and safety literature needs to be read and understood. The right equipment needed will be listed in the installation instructions.
The substrate needs to be clean, absorptive, and uniform in texture. This is usually produced with the use of a walk-behind grinder fitted with diamond abrasive tooling.
With all projects requiring a color stain, substrate color is an important part of the design. It needs to be prepared, and the materials applied correctly. Whether this is beyond your ability or you need a refresher course, Niagara Machine has the technical knowledge needed to get you on the right track. We sell concrete stain materials as well as all the surface prep equipment for the job! Our field representatives are well-versed in every step required for a successful stain application. They are available to walk you through every step.
Give us a call to put you on track with your next stain project. It’s always beneficial to go into a project with knowledge of how to properly start and finish.